Showing posts with label projects. Show all posts

Friday, September 7, 2012

Why I've Been MIA and the Mess I Call My Sewing Room

My life has changed quite a bit since June.

My part-time job turned into a full-time plus job. It was totally unexpected and unplanned. My boss had decided to retire and I was asked to step in as her replacement...it was a very busy time, with new responsibilities. As Director of a Crisis Pregnancy Center, there is a lot of emotional "stuff" that comes with the job.

 Working six days a week for two and-a-half months became pretty grueling and I'd come home at the end of each work day and flop on the couch. I was dog-tired.

"Dog-tired" means never having to do anything other than what is absolutely required to maintain existence.

Which brings me to the whole point of this post...the parts of my life that took a hit were (a) my sewing and (b) the cleaning of any room that company wasn't privy to: my bedroom and SEWING ROOM.

This is a disturbing scene, so look away if you have a weak constitution:


Sewing Table
 That is my junk pile sewing table. "Hi, Bob Marley, how you doin', Mohn?" That's my Jamaiccan accent.

There's lots of stuff on this table. What you're looking at is the right-side of the table. The left-side is too horrific to look at.


Counter/Desk Work Area
And here is my desk. You'll never believe this, but this is after a tidy-up. I didn't finish, is it obvious?

 Look, the walls are pink. PINK! What in the world was I thinking? I'll tell you what I was thinking...I was thinking I'd turn my sewing room into a cool-looking studio like the one I saw on HGTV 10 years ago. I didn't get results anywhere near that beautiful studio. Now I'm stuck with Pepto Bismol walls!

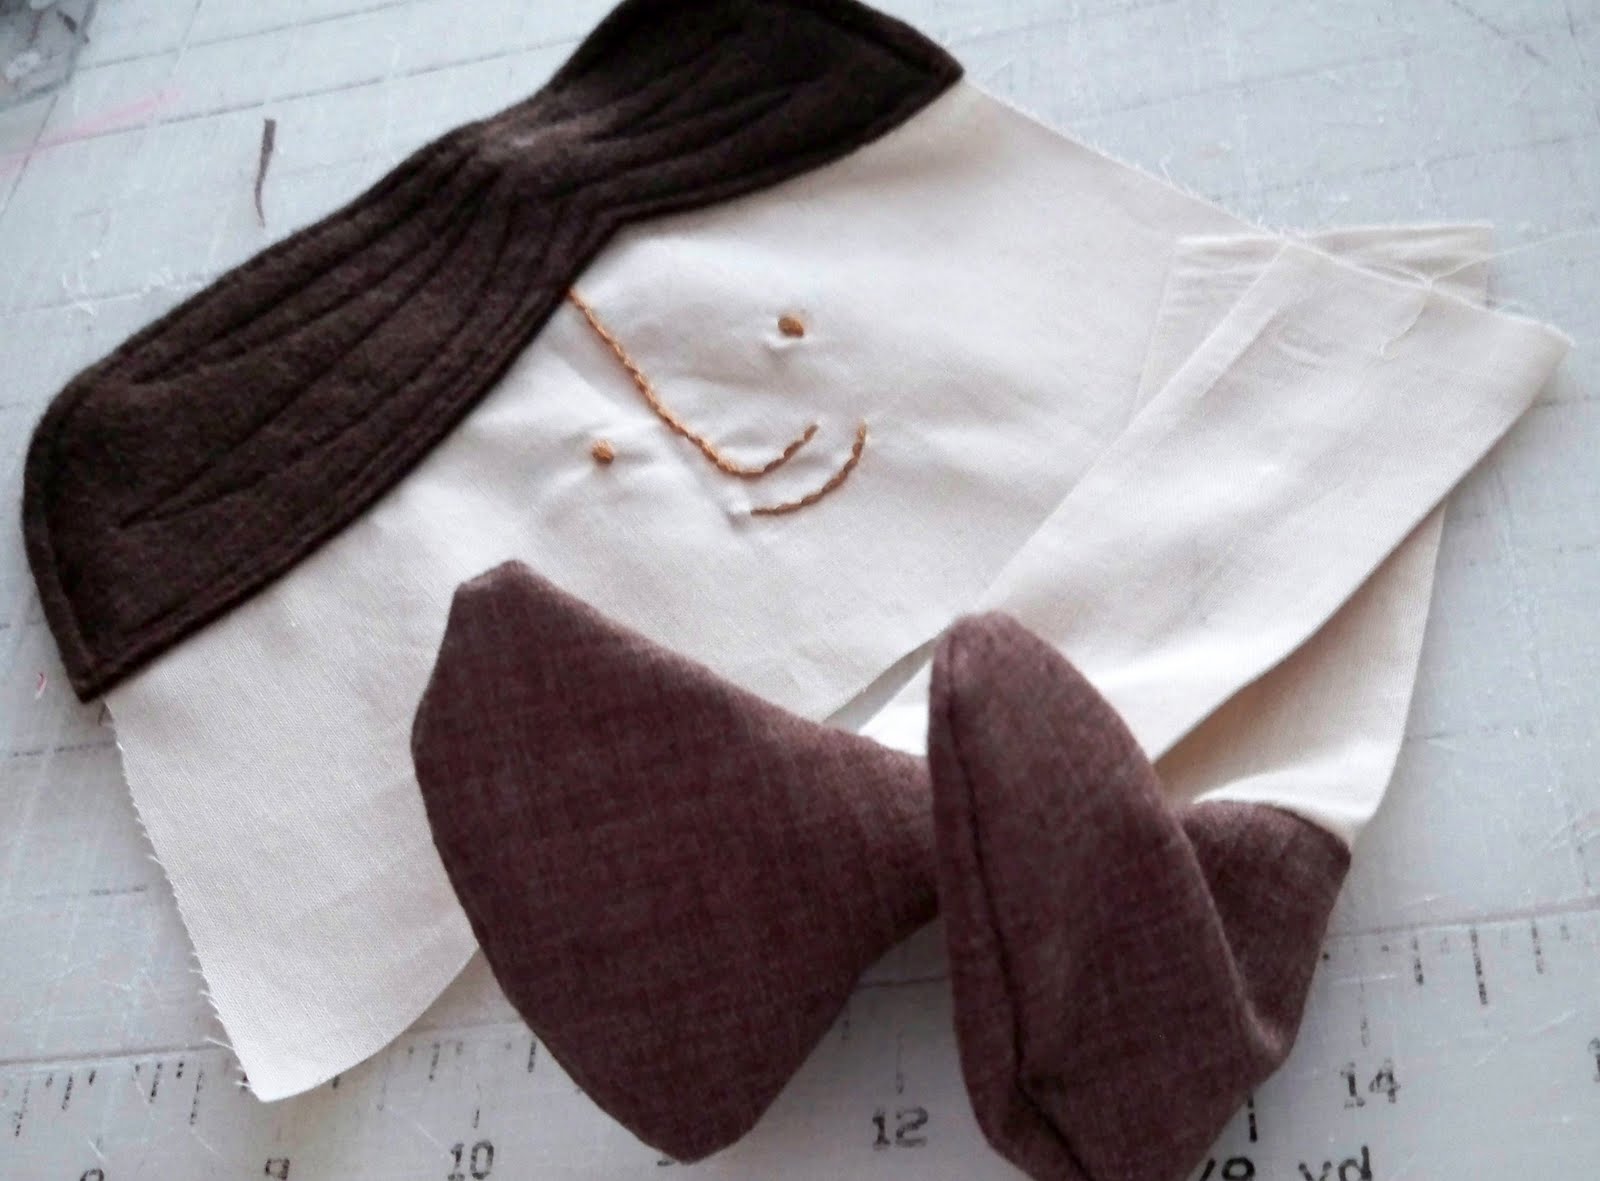
See the arrow? It's pointing to the little felt doll Ive been working on. I didn't do anything more with little dolly...she really needs some hair! There's a Winnie the Pooh wallet, some bells, a pattern made from freezer paper, all kinds of miscellany.

I was thinking that I should just craft my way out of the mess. Rather than buy anything new, just make goodies out of the supplies I already have. Perhaps I could start a "Purge Along" for crafty bloggers...hmmmm....

If I clean up, I could do some great sewing while cleaning AND make this:


Darn it, this  pattern is out of stock. Which sent me into a tailspin, because I think this is one of the cutest aprons I've seen in a long, long time! So I did what any self-respecting Pinterest aficionado would do...I hunted for a tutorial and Pinned every last tutorial I came across that might help me recreate this little number. I then scoured the closet of my husband and son for a nice collared shirt...I didn't find a thing, not a one! Maddening! So tomorrow, I'll be hitting the thrift stores for a few cheap mens' shirts. Men. Why can't they hang onto old clothing like women do?

Anyhow, who needs a stinking pattern? I'm going to give this apron a try and you'll be the first to know if I'm successful at recreating this. But first, I'll finish organizing my sewing room.

Which means I'll have a finished product to show you 3.5 years.

This is my story and I'm sticking to it!

Friday, August 24, 2012

she has a face!


I make dolls. There are no little girls in my life and yet, I make dolls. Once I see an adorable pattern, I can't stop thinking about the cuteness of the doll and how much fun it would be to make. When I was a little girl, my dolls were so important to me, I loved them so much! Perhaps this doll-making frenzy is a little trip back in time. Whatever the reason, this is a lot of fun!

Cutting out those tiny little eyes and then sewing them on her head was quite a challenge, not to mention the fact that I put her cheeks on the wrong spot and had to cut them out and reattach them. Poor girl. She looks so weird, but I do believe that once her hair is on, she'll be super cute. Her little dresses are cut out, all that's left to do is cut out the batting, sandwich the layers and sew her up.

There also happens to be a pattern for dollhouse carrier, which is adorable. I'm hoping that once the faces are complete, the rest of the dolls will sew up fast and I can spend a few days trying to decide if I want to buy the pattern for the house. Can one really have the dolls and outfits, but no house?

I don't think so!

Wednesday, August 22, 2012

Little Dolly


Yup, it's another doll.

This is a "paper" doll, made from felt!

I know, it makes no sense and yet, it's a brilliant idea.

I wish I could have just ONE brilliant idea...

After a long run of absolutely no creative mojo, I ventured into my sewing room, opened the closet door and rummaged through some beautiful fabric...

...which made me realize how much I've missed making things.

I have three dolls cut out and tonight, added their mouths and cheeks...TWICE! I didn't like the placement of the rosy little cheeks, so I cut the threads and moved the cheeks, resewing them in the proper spot.

I don't quite understand why these projects take me so long, but I'm going to embrace this fact and cut myself some slack. I ALWAYS angst over the amount of time a project takes.

Once round #2 of the same project comes around, I pretty much cut the time by half. And then I really, really enjoy the sewing process.

You do realize Suzy's birthday is coming up and Christmas is just around the corner?

Suzy's gift is just about finished...

And before you and I know it, we'll be sewing up a storm for the incredibly fun holidays that are just a few short months away.

BRING IT!!!!

Have scissors, will travel!

I can't wait!

Wednesday, April 11, 2012

it's beginning to look a lot like Christmas!


This is a Christmas-quilt kit.

I've had for about a month...

and it hasn't changed! It still looks just like this.

When I get around to putting this together, it's going to be one sweet, happy quilt!

There's only one thing...I have a problem cutting into pretty fresh fabrics.

I like to sit and look at it, admire it, appreciate it.

I'm thinking this quilt is never going to happen.

Time will tell.

Do me a favor...remind me about this kit in a few months, K?

Thanks bunches!

Thursday, March 1, 2012


These are my girls...my first dolls.

I am having such a blast with these dolls! I love coordinating the fabrics, sewing the dresses, ironing the dresses...I think these are the little girls I never had!

The pattern for the dolls were purchased from Retro Mama...as was the pattern for their sweet little dresses. Which are reversible, by the way. So she really has two little dresses. There's also a pattern for a little cape, but I haven't tried that yet. Maybe soon...I want to make a few more dolls and list them on Etsy.

These girls are available for purchase, if anyone is interested. Their little faces are embroidered and their dresses are made from lovely, durable fabric. The hair and shoes are constructed of wool felt...

My favorite thing about this dolly is that she's so old-fashioned. She's a perfect, wholesome companion for a little girl.

It's going to be sad letting go of these darlings...I've so enjoyed looking at them spending time together in the family rocking chair!

Friday, February 17, 2012

hooker school.


I've really, really been wanting to learn how to crochet. Like I don't have enough "stuff" (aka "projects") already in the works. Let's see...I'm currently making dolls. Prior to that, purses and prior to that, boxer shorts. Purses, wristlets, purses. A few wallets, banners, aprons, hats...

I am confident that my squeeze, Jason, is going to be thrilled with this newest endeavor. I have a sweater that fetches all kinds of compliments, but sadly, I always have to deny having anything personally to do with its marvelous construction. Just once, I'd like to say, "Why yes, I did make this, thank you!"

I really don't think it's a coincidence that I stumbled across a site dedicated to free crochet lessons. Complete with "how-to" videos. This is destiny, baby!

The link to crochet love is right here. If you're interested in attending, it's free and I'd love to have you as a classmate.

Grab your hook, some yarn and I'll see you in class!

Sunday, February 5, 2012

pairs of spotty gams!


So I couldn't resist these sweet polka dots and Mary Jane's...these are the cutest doll legs!

~Heads/faces: check, check
~Arms: check, check, check, check
~Bodies: check, check
~Legs: check, check, check and check!

Now to assemble and stuff them. I cannot wait to share these girls with you! So cute...

I scrapped the primitive doll...she just didn't look right to me. Oh, I'll be making her again. I just don't think I'll do the coffee-wash. Or maybe I will. We'll have to wait and see.

For the time being, this little doll is sweet and she's definitely on my obsession list. I may even make her a little coat...we'll see.

Check back in a few days...I'm really hoping I can stay focused and get them completed.

Super Bowl tonight! Go NY!!!

Tuesday, January 24, 2012

nakey-girl!


My foray into doll-making. This girl is going to be a primitive ballerina. In a few days, she'll be in her tutu and have her pretty hair in a pretty bow. Right now, she's drying out. Seems she took a bath in coffee and vanilla and now she's detoxing on a cookie sheet. I'm keeping my fingers crossed that she'll turn out OK. If all goes well, there will be a troupe of ballerinas dancing around the house!

Thursday, December 8, 2011

reindeer hair clips.

 And the camera is kinda broken, but not entirely so. It seems there's something amiss with the power cord. I don't know, Jason can get the cord just-so to download, but I have no luck at all. The reason I haven't posted in a few weeks...

Until I discovered the memory card and the little slot in the laptop. Mmmm-hmmmm, I figured it out. I can download my photos without the stinking cord. And I have overcome.


Meet my reindeer clip. I've been making these for a few years. I'm selling them at a local shop...they're also great to clip to your collar or lapel. Or purse, or hat. 


This is my hair, modeling the clip. I know, my hair is messy. No, not really. It's just curly and it always looks messy. Thank goodness I can't see the back of my head, or else all that messy-looking hair would really bug me. 

Thursday, November 3, 2011

clean herd.


Clean elephants, that's what the world needs...made from baby washcloths.


Have you ever seen albino elephants? Here ya go! Here are two!

I made this herd last night, while we watched T.V. They're really not too difficult to make...but the ears! The ears are definitely maddening.

I'm hoping with a little more practice, the ears won't be such a challenge.


Here's Pinky. Wouldn't you know that she turned out to be the cutest of them all?! She even looks kind of prissy, the way she's standing.

You're wondering what one does with these, aren't you?

You use them as accents on baby gifts or diaper cakes. And you can take the washcloths apart and use them on baby!

If you're interested in the pattern, go here. She has all kinds of washcloth creations and I happen to have my eye on a few more patterns. It seems I started off with the most challenging, but hey! The next project should be easier, right?

At least that's what I'm hoping!

Thursday, September 22, 2011

project on my table.


Yup, I have another doll on my table. My little boy-hero doll needs a damsel in distress! I've taken pity on him and cut out a little girlfriend for him.Her legs and arms are finished, as is her hair, but I need to find some fabric for a little skirt. This is kind of fun!

In other matters, can someone please send some cool air down here to the South? I'm frying! Summer clothes have all been deleted from the stores; sweaters, jackets and long-sleeved apparel have been downloaded into them! Sheesh, enough heat, already!

Maybe if I do some Fall decorating, I'll feel cooler. Thinking not really...but the house will look cute!

Saturday, September 17, 2011

I Need A Hero!

Super-heroes.

What the world just doesn't have enough of.

 That's about to change...

Because I am on a mission to bring some caped-crusaders to the world!

What's this? There must be trouble...


 My super-hero is racing to the TV...


Oh, now he's scaling the dog kennel. One of BB's "babies" must be in trouble!


 No, they're fine. It seems that my super-hero just wanted to introduce himself to them and let them know that if there's ever any trouble, he's right here!


 Oh, now his identity is revealed! He's relaxing, hanging out after a busy Saturday morning.

You'll be seeing more of this dude hanging around on this blog. You can find the pattern here.

Wendi Gratz is the designer of the pattern and her blog is Shiny Happy World. She has set up "schools" on her blog, to help guide you in sewing methods and embroidery stitching.

The patterns are fairly easy to make and very super-cute! If you have some basic sewing skills, you could totally make this little guy. Especially with all the help Wendi has available.

Next...some girl dolls!

Stay tuned!

Monday, September 12, 2011

little man.


There's a little guy on my table.

So far he has a face, hair, and legs with shoes, of course!

I'm having fun making him. Now I need to locate some old jeans and an old shirt. I think I'll raid somebody's closet...

This is a cute one, can't wait to share the finished boy with you.

And after he's stuffed, a girl will be in the works.

Have a great Monday!

Tuesday, September 6, 2011

this one's for Georgia, in Waterport, NY!

I've often wondered if this blog is worth my time and effort. I mean, what good does it bring? Is anyone actually reading and who really cares about what I'm thinking? I know my brother and my parents stop by to see what I'm up to...but does anyone else actually visit this site?

Apparently, they do! I received a very lovely email from a lady new friend in NY, introducing herself and telling me that she has visited the little green argyle/bird skirt I made a few weeks back...about 20 times! Wow! Apparently, Georgia knows my brother and his wife up yonder in NY, which in my world, makes her almost family!  I have to tell you, her lovely note gave me the jump start I needed to continue writing on this blog. It's not uncommon for bloggers to hit a wall, feeling that the only one reading their words is maybe their spouse or mother, so naturally I was delighted with her encouraging words and stories of my darling brother.

So in light of this revelation, this post is for Georgia in NY...

I bring you...


Argyle & Chevron!
I found this luscious brown argyle when Donna was visiting at the end of July...we were in a quilt shop together and I swooned. I bought the green argyle instead, thinking that it had an extra "cute" factor. But my mind always went back to this traditional brown argyle. Which makes me think of English gentlemen and pipes (Mr. Hawkes?). About two weeks ago, I went back for the fabric that's been burning in my brain, brought it home and made yet another pleated skirt.

The chevron pattern beautifully complements the argyle pattern. I had worried, at first, that the browns weren't feminine enough... but I think that it's a perfect combination for the new Season!

This skirt is a size 3T, with elastic on the backside of the waist. Picture it with brown tights and a cute long-sleeved tee or turtleneck and it will make a darling autumn outfit.

Thanks for writing, Georgia. Your kind words reignited my pursuit of blogging excellence (or at least what I strive towards!). I hope you enjoyed yet another round of argyle and I hope that one day soon, another creation resonates within your creative soul.

Thursday, August 25, 2011

skirt and somebody, stop me!


I found this pattern for a little girl's skirt and fell in love with the pleating detail. There's only one problem.

We don't have a little girl.


 Knowing this pattern could produce a really cute skirt, I was on the hunt for cute coordinating fabric, that the little-girl-we-don't-have, would love to look at and feel pretty in.


The green argyle caught my eye and I knew it would be great for the pleat. There was a coordinating turtle fabric, but the little-girl we-don't-have didn't really gravitate towards the turtles...cute, but boring.

Instead, the birdies flew before my eyes and I knew in my heart this was the perfect combination for the skirt.

I came home and made the skirt. It's not perfect, but the first is always tricky...those to come will be much easier.

In case you're curious, this is a size 2T. The sizes run from 12-months to size 10...and there's even a matching doll skirt.

I might just have to make a few more and hopefully, sell them in my Etsy shop.

Inspiration, get thee away from me! Whatever am I going to do with these girlie dresses?!


Wednesday, August 24, 2011

making dresses.


I don't think it's going to fit. Once I wash it and if it shrinks, I don't know how I'd wear it!

Sunday, August 7, 2011

Birthday Cake Banner!

Birthday Banners...they're fun to make and the recipient will look forward to hanging it year after year!

I've never written a tutorial before, but this will give you some ideas of how to put a banner together.

There's not much sewing...I  turned under the raw edges of the cotton canvas and made a 2-inch pocket for a dowel or decorative rod to be inserted, so that the banner can be hung. I also sewed a zig-zag stitch around the cake and cake stand, before embellishing the cake.

 Heat 'n Bond is used for adhering the fabric to the canvas.

 Gathered tulle looks lovely on a little girl's banner. Add some crystals to make it sparkly!


A strand of white plastic pearls create a lovely-looking icing effect.


 Use your printer to make the lettering. Simply choose your font, enlarge and choose the outline option. Adhere your Heat 'n Bond to the wrong side of all your fabric and you're half-way to being finished! After applying the Heat 'n Bond, place your letters BACKWARDS on the paper side of your fabric. This way, once you outline your letters and cut them out, flip the letters over to the right side of your fabric and you have "Happy Birthday!"


I designed my own cake stand. You can see the white Heat 'n Bond peeking out from under the purple fabric. These are the tiers of the cake, also with Heat 'n Bond ironed on the wrong side of the fabric. After you have your lettering placed and ironed at the top of your canvas, decide where to place your cake and cake stand. Remember to leave enough room for the candles to be placed at the top and the name of the birthday boy/girl at the bottom of the canvas.

I used a strand of black plastic beads to use as the legs of the stand. I've also used fabric paint in previous banners, to use as the feet of the stand and to simulate icing on the cake. On my first banner, I painted the lettering on the canvas. It is a little more labor intensive, but still cute.

 Here is the lettering, outlined backwards on the fabric. It's really very easy.


I hand-rolled the fabric flowers, using crystals and beads for the middles. There are loads of fabric flower tutorials...check here, here, and here.

This was the first time I used Fun Foam for the candles and I have to say, they were easy to make and very cute! I make a bag of candles, so that a candle can be added each year. Just take a piece of tape and stick it to the banner for the big day!

A banner can be used for multiple siblings. You might make theme banners that can be used for both boys and girls. Your imagination is your limit...just cut-out the names of your children and instead of permanently adhering the names, just tape them on with Scotch tape.

You might decide that a cupcake is more your style. Go ahead, that would be super cute! I desperately wanted to make this banner as a cupcake, but my friend wanted a birthday cake... :(  

Pirates would make a cute banner...a Jolly-Roger flag with swords, eye patch, etc...

Dinosaurs, ballerina, tanks, mermaids, Army, gymnastics...all would be very cute themes. You could attach little toys to the banner.

If you'd like more information on the dimensions of the banner, leave a comment and I'll answer your question.

Thanks and Happy Banner!

Sunday, July 31, 2011

Birthday Banner Tutorial

Birthday Banners are a specialty of mine. They're fun and you can whip it up in no time!

Not into sewing? No problem! There's a new kid in town and its name is "Glue!"

If you sew, you most likely have a lot of fabric scraps jammed into a basket or stuffed in a drawer (stop looking at me like that!).

If you don't sew, consider yourself fortunate you don't have an out-of-control textile addiction.

Collect your supplies...if you have Joann's coupons, you can make this project for under $14. Without a coupon, about $20. But the banner will be used year after year and because it was made with love, it'll be a keepsake forever.


Oops, the tiers are in the wrong order.
The first (or bottom) tier is the larger measurement.
The second tier is the smaller measurement.

Go grab some stuff to get started:

Duck Cloth (white): 1 1/8 yard (you can just get a yard, it'll be a few inches shorter)
Cute Fabric: 1/4 yard each of two coordinating prints
Fabric for "frosting": 1/8 yd (or you can just use fabric paint)
*Option* 1/4 yard of fabric for cake stand (or you can paint this on the canvas)
Heat 'n Bond: 1 yard
Embellishments: ric rac, ball fringe, tulle, ruffles, ribbon, etc
Fabric paint
Yellow or Gold felt
Velcro

I'll be working on this over the next couple of days. At the end, you'll need a dowel or a decorative rod. But you can figure that out later. I think I have all the supplies listed, but don't hold me to it. There's usually a little "something else" I've remembered at the end of the project.

Here we go!

This is my first tutorial, so hang in there with me. If you have any questions, give me a shout, 'k?

Tuesday, July 19, 2011

Green Purse

Green Purse. Pfffffft. Don't let the uninspired name fool you. It's so much more than green!

*Note to self: "Use the correct color information, it does make a difference!"

The color palette is "Citron and Grey," a hot color combination in the world of textiles.


There's an outside back pocket, but I didn't think to take a photo of it. It's not that I'm lazy, I just didn't think to snap it until just now. I've been dusting and cleaning toilets...perhaps the bleach addled my brain.

I thought the purse needed a little oomph, so I rolled this flower, put a little tulle behind it and attached a pin. The flower is removable...it can be attached somewhere else on the purse, on your clothing or in your hair...though I think it'd hurt if you try stabbing the pin portion in your skull.

I don't know, maybe I'm over-thinking things. I think I'll get back to my cleaning, now.

Housework is sooooo stupid overrated!

I'll be putting this purse in my etsy shop within the week!
Related Posts Plugin for WordPress, Blogger...